Sometimes you just have to make something of it all. A switch is thrown and you go from consumer to producer...
Sunday, December 11, 2011
Homemade magnetic dog flap nirvana
"Sometimes I have to pee in the middle of the night. Sorry."
We've got a very large dog and a correspondingly large doggie-door. The rubbery
flap that came with the door, never great, warped and wore out over time
so the metal magnetic contacts that held it shut no longer lined up. We
found the manufacturer of the door was no longer in business so
replacement flaps weren't an option. Worse still, the door size was in
between the sizes for other doors, so replacement wouldn't be easy. Our
options seemed to be buying a new kitchen door, putting an even bigger
hole in the existing kitchen door, or building a frame inside the
existing frame to hold a smaller doggie-door.
After hours of fruitless googling, with banshee winds howling through the kitchen nightly, I racked my brain to figure out how to replace the manufactured flap with a homemade version, and wandered the aisles of the hardware store until finally inspiration struck. With about $20 of materials, a few hours of tinkering and some false starts, I made a magnetically-sealed flap that was far superior to the original: It worked reliably and sealed as tight as a drum! I was really proud of the replacement flap but had blown the chance to document how it was made for the next despondent googler.
A year later, when our new kitten came home and we locked the dog out of the house for a while, she chewed up my lovingly hand-crafted door and we were back at square one. Ungrateful bitch! On the other hand I was happy because I knew just how to replace it and now I had the chance to document how it was done... You want to know, am I right?
The original door came with a rubbery two-part flap: For going one way, an inner flap that's the size of the hole, and for going the other way, an outer "frame" flap that overlaps both the inner flap and the metal frame. The flap sections each had a few weak magnets spaced around the edges to seal the inner flap to the outer, and to seal the outer flap to the frame. The seal was reasonable, but not great. Over the course of a few years, the door warped, got chewed on a few times, and finally just wouldn't seal correctly anymore because the flaps were too misshapen for the magnets to line up. Unfortunately I've long since disposed of the original so I haven't got a picture of it.
My replacement flap keeps the same basic idea of an inner
rectangular flap and outer framing flap, but uses a much more reliable
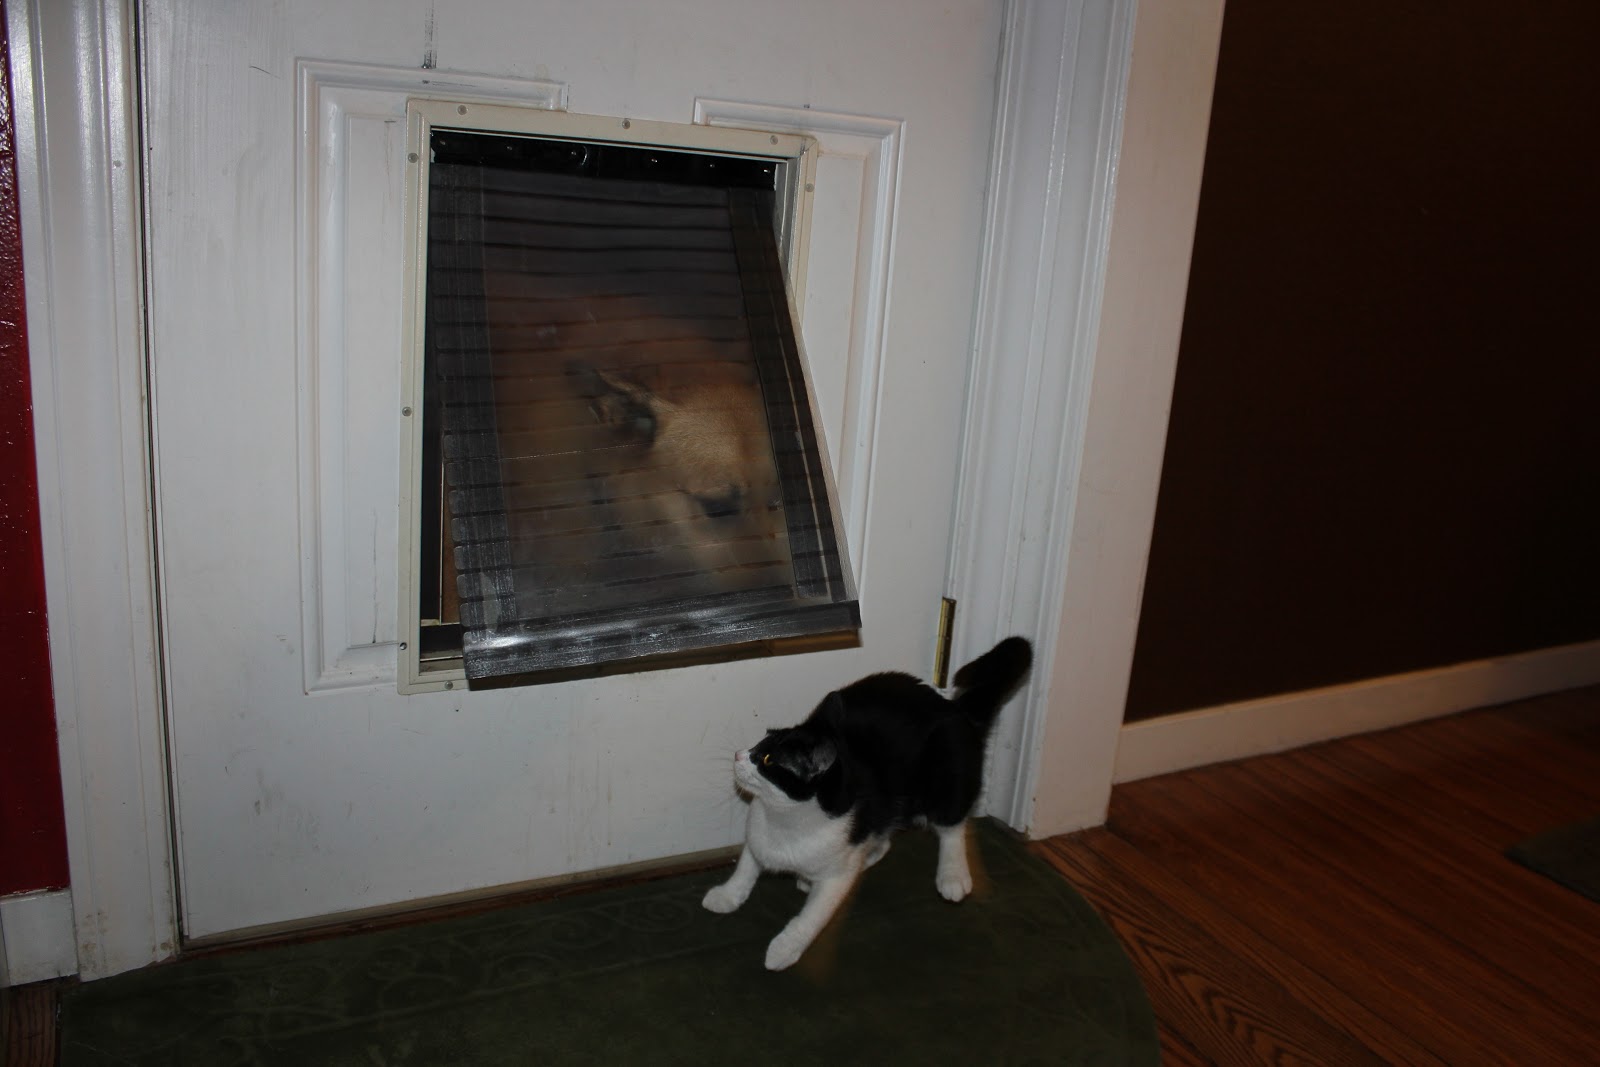
seal made of magnetic tape that goes all the way around the edges. I'll jump ahead a bit to show you how (awesomely) it works.
"INCOMING!"
Coming
into the house, the inner flap pushes the outer flap away from the doorframe and they
both swing up. When they flap back down, the magnetic strips around the
outside edge of the framing flap align and attach with magnetic strips
on the doorframe's edges.
Here's a video. Note how satisfyingly solid and precise that seal is!
Only got her to stick her head out far enough for a treat, too cold today!
Going out
of the house, the inner flap pulls away from the outer framing flap (which is magnetized to the inside of the doorframe) and
only that part swings up. When it flaps back down, another set of magnetic strips around its edges
reattach the overlapping portion to the stationary outer framing flap.
Again, a very satisfying slap demonstrates the nice tight seal:
Note it is also cat-proof, although this may be temporary. (She has been observed carefully studying Penny's use of advanced canine technology.)
OK, back to the building details... Here you're looking at the ruined post-kitten-introduction-chewing version I'm re-replacing from the house-interior side, to help you see a little more of how it works. I was figuring out what I was doing as I went along, so this one was a little rough around the edges.
Vinyl floor runner, large enough to cover the hole twice over to make two flaps
Contact cement (because the adhesive on the magnetic tape sucks)
And of course, duck tape
Not pictured are the only tools you'll need: a box cutter and scissors.
You'll note I did not include a tape measure or ruler. It's because they actually aren't necessary! Everything gets sized, cut, glued, etc. right inside the frame so there's no need to measure much of anything and you'll end up with a perfect fit. (This is a dramatic improvement since building of the first one, which was tape-measure-city yet not as exact.)
I've removed the old flap from the doorframe.
You can see three strips of 1" wide magnetic tape already around the
side and bottom edges. (If you're starting from scratch,
you can start by applying some contact cement to the back of some magnetic tape
strips to make your
frame look like this.)
I cut a sheet of the carpet runner large enough to cover the whole interior of the doorframe. (Use the box cutter rather than scissors to make this easy.) This will become the outer, "frame" flap... Start keeping track of which one's which!
Here I've cut another sheet of the carpet runner that's just as tall, but only as wide as the actual hole through the doorframe.
Here I'm measuring out four strips of 1" magnetic tape the same length as the height of the hole through the door. You can cut the tape with heavy-duty scissors like these. I'm not actually fastening anything here, just getting the right size.
Key bit here: I'm about to use the contact cement to glue one of these magnetic strips in place, but before I do that I stick it face-to-face with another strip so the two magnets are on the inside, with the sticky sides outward. The way the strips are made, there are alternating stripes of of north/south polarity down the length. You'll find they only align exactly one way; if you find them pushing against each other or otherwise resisting aligning, turn one around.
I want this thing to last so I don't trust the adhesive under the strip's tape backing, which can be pretty weak. Instead I brush on contact cement and wait 10-15 minutes for it to be ready for bonding (per directions on the bottle). Here the cement-brushed side is up.
The two strips are flipped over and pressed down in place, against the right edge of the hole. Then the same is done for the left side.
Now we remove the paper covering the adhesive on back sides of the top strips that are not yet glued to anything. Brush them both with contact cement and wait a bit. Note that the two pairs of strips are still perfectly aligned...
...which is important when we bring back the wider flap, line it up at the top edge, and smooth it down in place, pressing hard on the portion covering the strips. This was the main bit, everything from here out is easy.
Just peeling up the wider flap here to give you a look at how it's all lining up. (You can see that the wider flap is just begging for another strip of magnetic tape to be applied to its outside edge to match up with the ones on the frame. Patience, it's coming!)
We're going to do the same glue-in-place-already-stuck-together thing with a pair of matched strips at the bottom edge of the narrower flap, positioned just inside the doorframe edge. However, note we've switched to the smaller 1/2" magnetic tape here. The reason is that the dog will be nosing it open at the bottom, and we want the bond between the flaps to be a little weaker so she's able to peel them apart. Once she's got her nose into the gap at the bottom edge, the sides will peel apart easily.
I skipped showing gluing of the top of that pair (where my fingers are on the paper above), but you can guess how it went... Remove paper, brush cement, wait, push top flap down hard. Once that's done, you can peel away the top/wider flap and set it aside. In this picture we can see that the extra vinyl at the bottom edge of the narrower flap is no longer necessary. Run the box cutter along right under the new thin magnet strip and get rid of the excess.
(Updated: I missed this step when I posted this originally! You'll need to cut a rectangular center hole out of the wider flap now. The hole is bordered on three sides by magnets at this point, so it's easy to see where to run the box cutter there. For the top edge, you need to cut straight across at the height of the doorframe hole, but be very careful not to cut all the way through the sides. Sorry I didn't get a picture of this, but it should be pretty clear.)
The flaps are held onto my doorframe by some screws through holes in the
top, which go into threaded holes on two plates, shown here. (This
method is part of the original door, not something I did for this
project.) The stock door stayed on the screws really poorly due to weird
slots from the top edge of the rubbery flap down to the screw hole and
periodically came loose, usually when it was raining and windy outside.
Grrrr...
We can reuse that mechanism for this replacement flap. However, the top side of the wider flap we just cut a hole in is pretty flimsy. So before we punch holes through the flaps for the screws, it's duck tape time. I folded strips around the top side of the wider flap a few times, then put a folded strip lengthwise along the edges of that portion to reinforce them. I similarly reinforced the narrower flap, then punched holes and put the screws through them into the plates. It seems like the duck tape is enough reinforcement because they've shown no signs of coming loose (even after the pup was actively pulling on them).
Finally, here's a shot of the finished product in situ. I did minor trimming with the scissors around the inside bottom edge
to ensure the wider flap is clearing the edge of the frame easily, but
only took about a millimeter off (probably the thickness of the duck
tape at the top edge offsetting it down).
The fit is exact and there is absolutely no air leakage.
The vinyl material stays relatively
warm when it's cold outside. I could probably insulate the flaps better
(eg glue flannel or thin foam sheets onto them) but it's probably not
necessary where I live.
The vinyl floor runner material happened to have textured stripes
on it which (in my opinion) makes it look nicer. They also help mask
scratches and dirt that naturally accumulate over time with doggie use. If you aren't looking at this thing very closely, you'd never know it wasn't originally part of the door!
And that's it, mission accomplished. You're welcome, Internet! It's the least I could do to pay you back for all the times you've helped me... You deserve it.
Updated: A friend wanted to know just how much feline-force the containment field could stand. I made this little video to demonstrate:
No, outside... It's big enough for a human to crawl through, but only so long as they're willing to get face-to-face with the frantic, growling, barking security system snapping at them from the other side.
However, I would like to say I puzzled over how the two flaps go up when entering, but only one flap goes up when exiting thing. Wouldn't the flap that doesn't go up when exiting bloCk the hole?! Then I realized tHe one flap is cut out in the middle; it's really just a wide border to help te magnets establish a seal.
Well, that little detail aside, great work. Thanks again.
This is awesome! So much cheaper than a brand new dog door. I am actually going to try this from scratch, without using an existing pet door frame. Thanks for the great tutorial!
I wonder if you could help me please. I am trying to make a flap to replace where the glass was on my french door. My just adopted pound doggie made his own opening...busting in! Yikes! Can I email you?
Any idea what thickness your flap material is. I'm having a hard time finding this on the net. Best I could do ATM is 20mil. I'm thinking thicker is better.
@Mary: I don't think I can help you with that... This is about as handy as I get.
@smithmal: As I said, I just used regular carpet runner. It's thick, but probably not as thick as it could/should be, since it's showing some wear/wrinkles now. So I'd say go for the thickest you can get.
Just wanted to give you some feedback on the magnetic flaps I built and some "lessons learned."
I have three dogs and wanted to build a two entrance door dog house that was insulated with an internal heater to keep the mutts warm in the winter. A rough illustration of what I built can be seen here: http://s29.postimg.org/a3hn7rbbb/dog_house.jpg
We have a huge sun room in the back of our house that is not used very much so we would keep the pet house in there. The sun room gives the added advantage of eliminating wind and rain (therefore the house is not weatherproofed).
Because we do entertain in the sun room from time to time, I needed to ensure that the house would be mobile, so I fitted it with 6" casters. The house is primarily built using 2" x 4", plywood and R16 insulation (top and bottom of house. The interior of the house is sealed using weather proofing caulk. The dog heater was amended to the one in the illustration (didn't pass the WAF "Wife Approval Factor") so we went with this one: http://www.amazon.com/Hound-Heater-Pet-House-Furnace/dp/B004E2G49Q/ref=sr_1_1?ie=UTF8&qid=1390937760&sr=8-1&keywords=dog+house+heater
Now to the magnetic door flaps. I had a great deal of issues with them primarily due to finding the correct material. I was unable to find a floor runner that would fit my dimensions so I decided to purchase a floor mat and carve it up to my needed dimensions. The first mat I bought I went with the thickest vinyl material I could find: http://www.amazon.com/gp/product/B00620VPVU/ref=oh_details_o04_s00_i00?ie=UTF8&psc=1 (I got this on clearance from Amazon warehouse for $35)
That material turned out to be way to thick. So thick that the material would not act like a flap, more like a door which is not compatible with your design.
Back to the drawing board I got this: http://www.amazon.com/gp/product/B005L4NR1Y/ref=oh_details_o05_s00_i00?ie=UTF8&psc=1 (got it on clearance from Amazon Warehouse for $20).
This proved to be much easier to work with. The problem was that it was a huge floor mat that was shipped wrapped up in a narrow tall box. This made cutting the floor mat very difficult as it was permanently curled. I did find out that you can easily relax plastic by heating it in your oven @ 170F for 3 minutes.
When I finally got the mats cut, I noted that they were not exactly the size I needed and should have cut them conservatively, then matched them to the door opening and then done a final more exact cut.
Magnetic tape. I will note that all magnetic tape is not equal. You basically have three thicknesses (or strengths): 0.03", 0.06" and 0.12". The "Goldilocks" for magnetic tape is 0.06". I purchase a 0.03" and it was much too weak to be effective on the door flaps I used. The link below is the tape that worked well for me. As you mentioned, using contact cement is necessary when installing the tape onto the door opening and the flaps. http://www.amazon.com/gp/product/B005HY9XFC/ref=oh_details_o02_s00_i00?ie=UTF8&psc=1
I attached the exterior flap first temporarily using two staples from a staple gun. It was important to make sure that the exterior (small) flap was positioned just right so that it would not be hindered by the bottom or sides of the door opening. I then attached to top (large) flap over the small flap using 3/4" screws and two 4" metal "mending" plates I purchased from HD. http://www.homedepot.com/p/Everbilt-4-in-Zinc-Plated-Mending-Plates-2-Pack-13614/203170050?MERCH=REC-_-NavPLPHorizontal1-4-_-NA-_-203170050-_-N
The flaps are now installed and working well. On a 25F winter day, the pet house gets to be about 50F which is acceptable for the type of dogs I have (terrier mutts).
Thanks again for posting your flap design, it was a big help to me.
Sorry, final comment and this is a little off topic, but since we're talking about DIY projects for dogs...
For the interior of the dog house, we had a custom pet bed made (5' x 2'). Being that my dogs are terriers and love to chew, I wanted to find some material that was as tear proof as possible. After some research I decided on using military grade ballistic nylon (1680D; which is what parachutes are made out of). You can actually purchase the fabric pretty cheap (I got three yards of 6' wide material for $30 on ebay):
I had a seamstress construct the bed with a heavy duty zipper on the back and an interior cotton inner lining. I then filled the bed up with cedar chips which is a great deodorizer/pest repellent.
@smithmal: Wow, what an awesome project! I'm envious of the time you were able to spend, and I hope your mutts appreciate what you've done for them. Thanks so much for reporting back, and I'm glad you were able to make it work for you. Maybe sometime you can make a more formal write-up with pictures somewhere to pay it forward to the next frustrated searcher?
Yes, it swings both ways... I'm sorry it's not clearer, but that's the whole point. There's the "flap" part which is small enough to swing both in and out. And there's a "flap-frame" part which attaches to both the flap and the metal frame in the door itself. Pushing "in" from one direction separates the flap from the flap-frame and the dog steps through. Pushing "out" from the other direction separates the flap-frame from the door, picking up the flap with it, and the dog steps through.
That really depends on how strong/wide you make the magnetic strips. You could even do a "dotted line" of magnetic strip to reduce the amount of force needed (though you'd probably want to fill in the gaps with some foam tape just for insulation purposes).
I constructed this ingenious doggie door in a French door by removing 4 of the small glass panes. I used the same kind of plastic carpet runner material shown in the picture and magnetic strips which I added contact cement to in addition to the adhesive that cane on them.However I cannot get the glue to hold. It may be because I live in Hawaii and the door gets the hot afternoon sun on it. Do you have any other suggestions? Otherwise the dogs love it because they can go in and out all day (A German Shepherd and a chihuahua), and I love it because it saves me many trips of getting up and down
Thank you! It's the first cold and WINDY day here and that flap just won't stay shut. I appreciate the detailed instructions, I'll be headed to the store and getting to work.
I saw the commercial version "Ranger Freedom Pet Pass" https://rangerpetdoors.com/, and was trying to figure out how to make my own cat door from scratch. Now I just have to find the time to do it. Thank you for the how-to description


Does it open to the garage? Just wondering, as it looks big enough for a human to crawl thru. Very ingenious and clever! Smarty pants!
ReplyDeleteHugs, Karen
No, outside... It's big enough for a human to crawl through, but only so long as they're willing to get face-to-face with the frantic, growling, barking security system snapping at them from the other side.
ReplyDeleteOh man this is great, thank you!
ReplyDeleteHowever, I would like to say I puzzled over how the two flaps go up when entering, but only one flap goes up when exiting thing. Wouldn't the flap that doesn't go up when exiting bloCk the hole?! Then I realized tHe one flap is cut out in the middle; it's really just a wide border to help te magnets establish a seal.
Well, that little detail aside, great work. Thanks again.
Yeah, that's the bit that I tried to clarify in the "update" note. Hope it's helpful!
ReplyDeleteVery nice! Ive been looking for something like this.
ReplyDeleteThank you
This is awesome! So much cheaper than a brand new dog door. I am actually going to try this from scratch, without using an existing pet door frame. Thanks for the great tutorial!
ReplyDeleteGood to hear it, glad I could help! Let me know how it turns out.
ReplyDeleteI wonder if you could help me please. I am trying to make a flap to replace where the glass was on my french door. My just adopted pound doggie made his own opening...busting in! Yikes! Can I email you?
ReplyDeleteAny idea what thickness your flap material is. I'm having a hard time finding this on the net. Best I could do ATM is 20mil. I'm thinking thicker is better.
ReplyDeletehttp://www.mytarp.com/clear-vinyl-fabrics-18-oz-by-yard-20-mil.aspx?gclid=co6g3de_77ocfyzamgodfmqatw
smithmal
@Mary: I don't think I can help you with that... This is about as handy as I get.
ReplyDelete@smithmal: As I said, I just used regular carpet runner. It's thick, but probably not as thick as it could/should be, since it's showing some wear/wrinkles now. So I'd say go for the thickest you can get.
Bret,
ReplyDeleteJust wanted to give you some feedback on the magnetic flaps I built and some "lessons learned."
I have three dogs and wanted to build a two entrance door dog house that was insulated with an internal heater to keep the mutts warm in the winter. A rough illustration of what I built can be seen here:
http://s29.postimg.org/a3hn7rbbb/dog_house.jpg
We have a huge sun room in the back of our house that is not used very much so we would keep the pet house in there. The sun room gives the added advantage of eliminating wind and rain (therefore the house is not weatherproofed).
Because we do entertain in the sun room from time to time, I needed to ensure that the house would be mobile, so I fitted it with 6" casters. The house is primarily built using 2" x 4", plywood and R16 insulation (top and bottom of house. The interior of the house is sealed using weather proofing caulk. The dog heater was amended to the one in the illustration (didn't pass the WAF "Wife Approval Factor") so we went with this one:
http://www.amazon.com/Hound-Heater-Pet-House-Furnace/dp/B004E2G49Q/ref=sr_1_1?ie=UTF8&qid=1390937760&sr=8-1&keywords=dog+house+heater
Now to the magnetic door flaps. I had a great deal of issues with them primarily due to finding the correct material. I was unable to find a floor runner that would fit my dimensions so I decided to purchase a floor mat and carve it up to my needed dimensions. The first mat I bought I went with the thickest vinyl material I could find:
http://www.amazon.com/gp/product/B00620VPVU/ref=oh_details_o04_s00_i00?ie=UTF8&psc=1
(I got this on clearance from Amazon warehouse for $35)
That material turned out to be way to thick. So thick that the material would not act like a flap, more like a door which is not compatible with your design.
Back to the drawing board I got this:
http://www.amazon.com/gp/product/B005L4NR1Y/ref=oh_details_o05_s00_i00?ie=UTF8&psc=1
(got it on clearance from Amazon Warehouse for $20).
This proved to be much easier to work with. The problem was that it was a huge floor mat that was shipped wrapped up in a narrow tall box. This made cutting the floor mat very difficult as it was permanently curled. I did find out that you can easily relax plastic by heating it in your oven @ 170F for 3 minutes.
When I finally got the mats cut, I noted that they were not exactly the size I needed and should have cut them conservatively, then matched them to the door opening and then done a final more exact cut.
Magnetic tape. I will note that all magnetic tape is not equal. You basically have three thicknesses (or strengths): 0.03", 0.06" and 0.12". The "Goldilocks" for magnetic tape is 0.06". I purchase a 0.03" and it was much too weak to be effective on the door flaps I used. The link below is the tape that worked well for me. As you mentioned, using contact cement is necessary when installing the tape onto the door opening and the flaps.
http://www.amazon.com/gp/product/B005HY9XFC/ref=oh_details_o02_s00_i00?ie=UTF8&psc=1
I attached the exterior flap first temporarily using two staples from a staple gun. It was important to make sure that the exterior (small) flap was positioned just right so that it would not be hindered by the bottom or sides of the door opening. I then attached to top (large) flap over the small flap using 3/4" screws and two 4" metal "mending" plates I purchased from HD.
http://www.homedepot.com/p/Everbilt-4-in-Zinc-Plated-Mending-Plates-2-Pack-13614/203170050?MERCH=REC-_-NavPLPHorizontal1-4-_-NA-_-203170050-_-N
The flaps are now installed and working well. On a 25F winter day, the pet house gets to be about 50F which is acceptable for the type of dogs I have (terrier mutts).
Thanks again for posting your flap design, it was a big help to me.
smithmal
ps - in case anyone is interested, below are the dimensions of my exterior and interior flaps:
ReplyDeletehttp://s21.postimg.org/tmfux3cjr/magnetic_flap_dimensions.jpg
smithmal
Sorry, final comment and this is a little off topic, but since we're talking about DIY projects for dogs...
ReplyDeleteFor the interior of the dog house, we had a custom pet bed made (5' x 2'). Being that my dogs are terriers and love to chew, I wanted to find some material that was as tear proof as possible. After some research I decided on using military grade ballistic nylon (1680D; which is what parachutes are made out of). You can actually purchase the fabric pretty cheap (I got three yards of 6' wide material for $30 on ebay):
http://www.ebay.com/itm/BLACK-BALLISTIC-1680D-NYLON-FABRIC-URETHANE-COATED-DWR-60-WIDE-BY-THE-YARD-/221349773647
I had a seamstress construct the bed with a heavy duty zipper on the back and an interior cotton inner lining. I then filled the bed up with cedar chips which is a great deodorizer/pest repellent.
smithmal
@smithmal: Wow, what an awesome project! I'm envious of the time you were able to spend, and I hope your mutts appreciate what you've done for them. Thanks so much for reporting back, and I'm glad you were able to make it work for you. Maybe sometime you can make a more formal write-up with pictures somewhere to pay it forward to the next frustrated searcher?
ReplyDeletehow does or does it swing both ways. I would need that option. for them to get out and let them selves in..
ReplyDeletethanks
witherig@yahoo.com
Yes, it swings both ways... I'm sorry it's not clearer, but that's the whole point. There's the "flap" part which is small enough to swing both in and out. And there's a "flap-frame" part which attaches to both the flap and the metal frame in the door itself. Pushing "in" from one direction separates the flap from the flap-frame and the dog steps through. Pushing "out" from the other direction separates the flap-frame from the door, picking up the flap with it, and the dog steps through.
ReplyDeletei have a mini schnauzer and 2 yorkies do you think the plastic would be to heavy for them to push thru?
ReplyDeleteThat really depends on how strong/wide you make the magnetic strips. You could even do a "dotted line" of magnetic strip to reduce the amount of force needed (though you'd probably want to fill in the gaps with some foam tape just for insulation purposes).
ReplyDeleteI constructed this ingenious doggie door in a French door by removing 4 of the small glass panes. I used the same kind of plastic carpet runner material shown in the picture and magnetic strips which I added contact cement to in addition to the adhesive that cane on them.However I cannot get the glue to hold. It may be because I live in Hawaii and the door gets the hot afternoon sun on it. Do you have any other suggestions? Otherwise the dogs love it because they can go in and out all day (A German Shepherd and a chihuahua), and I love it because it saves me many trips of getting up and down
ReplyDeleteThank you! It's the first cold and WINDY day here and that flap just won't stay shut. I appreciate the detailed instructions, I'll be headed to the store and getting to work.
ReplyDeleteNice blog, Thank you for sharing this amazing article with us. Overhead Door Magnetic Contacts
ReplyDeleteThis comment has been removed by the author.
ReplyDeleteI saw the commercial version "Ranger Freedom Pet Pass" https://rangerpetdoors.com/, and was trying to figure out how to make my own cat door from scratch. Now I just have to find the time to do it. Thank you for the how-to description
ReplyDelete